Sowing seed
Seed pre-treatment
Cold/refrigeration (stratification)
Some species require one to several weeks of refrigeration (stratification). Place seeds that need a cold period in a sealed container with moist vermiculite. Refrigerate for 2-6 weeks depending on requirements.
Hot water treatment
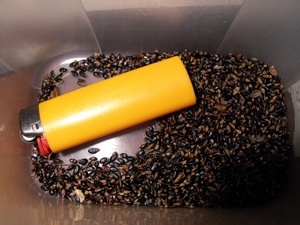
Put the seed into a nonporous container, cover with boiled water. Soak for 18 to 24 hours. Sow the seeds which have swollen. Treat again those that did not swell. Seeds that float or do not swell should be discarded as they are infertile.
Scarification
Roughen the seed coat using fine sheets of sandpaper or nick the seed with a thin sharp knife. This allows water to penetrate the hard seed coat. Pay attention not to damage small fleshy appendage called the aril, which develops into the root.
Dry heat
Spread the seeds in a thin layer on an oven tray. Place in the oven at temperature indicated for that species Remove as soon as the seeds have popped open. Do not burn.
Further information
Select a seedling species in the Seedling Database to find information about the:
- seed description
- seed image
- pre-treatment
- germination notes
- sowing notes
- image of seedlings at different stage of growth
- image of the mature tree/shrub/grass.
Sowing the seeds
Sow your seeds in seven easy steps. Some species may need special sowing requirements, you will find information for each species in our Seedling Database.
For general sowing instructions follow the 7 easy steps below. TreeProject’s procedure is to sow the seed directly into the tube rather than in propagation trays. The method we use requires transplanting only if seed does not germinate in some tubes. Filling and sowing 48 tubes will take around 30 to 45 minutes.
Sowing Dates
Sow the seed on or near the dates shown on the seed packet. The aim is to have all the seedlings ready at the same time so you can share seedlings at transplanting time. Check the sowing dates and plan ahead. Note: contact your coordinator if you are unable to do this.
Step 1: Seed pre-treatment

Some species of seed requires pre-treatment to break dormancy of the seed. Check our Seedling Database to see if the seed you are sowing needs pre-treatment.
Step 2: Preparing the potting soil and filling the tubes
Be sure to review the section on Hygiene and Safety before proceeding.
Before filling the tubes, moisten the loose potting mix using a large nonporous container like a wheelbarrow or large plastic tub. The mix should be damp enough to clump when squeezed in your fist but not so damp that it drips and falls apart. Damp potting mix is safer (no dust to inhale) and is necessary for water absorption when watering seedlings – the water will run off the tube rather than penetrate through the soil if tubes filled with bone-dry potting mix.
You have in your supplies a packet of slow-release fertiliser. Thoroughly mix together 1 packet of fertiliser and 1 box of potting mix in a clean wheelbarrow or tub.
If the potting mix does not already have a slow release fertiliser in it, you will need to add an indigenous plant fertiliser to boost the seedlings along. A 3-month slow release fertiliser is best.
Fill the tubes with potting mix to 1.5 cm from rim of the tube. Scoop soil into the tube and gently tap on a firm surface to settle soil. Repeat till soil is 1.5 cm from rim of tube. There is usually a mark on the inside of the tube to indicate the right level. Do not push soil down to compress it – soil will become too dense for water and young roots to penetrate.
It is important that the soil is filled to the right point in the tube. A deep gap between the tube rim and the soil will allow water to collect in the top of the tube causing the seed to drown or seedling to get collar rot. You can see a small ridge on the right side of the tube where the soil should reach.
If there is a small amount of potting mix left over after filling all the tubes, set this aside in a covered container or plastic bag to use when you do the transplanting.
Step 3: Label species and date sown
Write the species name and sowing date on the labels with the waterproof pencil supplied. Label each box! Do not rely on your memory to know when the tubes have been seeded and which species is in each box. Each species of seed has its own timeline for germination. Documenting the date that the seed is sown is crucial in order to track the seeds germination timeline. If a seedling has not germinated after the expected date an extra seedling can be transplanted into that tube.
If labels fade with time, write them again.
Step 4: Sow seed
Choose a space that is protected and place your seed in a deep dish so that it does not blow away.
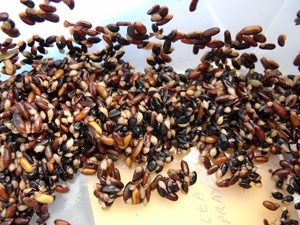
Many Eucalyptus seeds come with a large amount of chaff. Only the dark particles are the seed. The seed is heavier than the chaff and will shift to the bottom of the bowl. Mix well as you sow to ensure that you get seed in every tube.
Sow seeds on top of damp potting mix. If you have small seeds sprinkle all the seed evenly across all the tubes, for larger seeds place 3 or 4 seeds into each tube.
For species specific sowing notes check the Seedling Database.
Remove the newspaper from the bottom of the polystyrene box.
Place the tubes back into the polystyrene box in neat rows, tilting the end to prevent the tubes falling over. Pushing the tube bottoms together will help fit the required number into each box – 48 tubes.
Step 5: Mulch
Mulch (washed river sand or vermiculite) is used to hold seed close to the potting mix, to prevent seed being washed away and provide moisture retention during the heat of the day. Place a fine layer (approximately 2mm depth) on the surface of the seed and potting mix.
Step 6: Water with fine spray
Settle the seed and potting soil by watering with a fine spray.
Step 7: Germination
To start seedling germination your seeds must be kept moist and warm for the first 4-6 weeks.
Some species germinate within 2 weeks, some take a month or more. For example Melaleucas are very slow growers whereas Acacias and Eucalypts germinate within a couple of weeks given the right temperature, nutrient and sowing requirements. Each species has its own seasonal and temperature requirements and some Australian species like the taste of smoke in the soil to germinate.
Seedlings
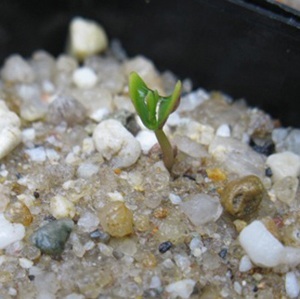
The first leaves to appear will be the cotyledons which are part of the plant’s embryo and quite different from the others. As the seedling grows the first pair of true leaves appear. The juvenile leaves of some species differ from the mature leaves. For example, some Wattles have segregated juvenile leaves that change into solid leaves as they mature.
Grasses
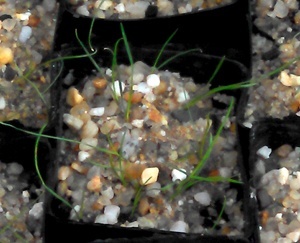
Grasses initially emerge with the coleoptile, a protective sheath of plant tissue that encloses the shoot tip and embryonic leaves. The first leaves or plumule will be thin grass like leaves.
Germination timelines
Check the Seedling Database for germination timelines and seedling images for individual species.
If your seedlings do not germinate when they should, please contact your coordinator of the TreeProject office. Sometimes we find that seeds are not viable and we may be able to send you another batch.