Transplanting
Seedlings from tubes with multiple germinations are used to fill in tube that has had no seed germination. The aim of transplanting is to ensure there is a seedling in every tube. Maximise your seedling numbers by transplanting any extra seedlings into empty tubes.
Follow the steps below to ensure successful transplanting of your seedlings. Incorrect transplanting can damage your seedlings.
Only use indigenous potting mix — do not use soil or compost from your garden. Generally, the smaller the seedlings are when transplanted, the better.
Step by step transplanting
- Remember to follow the hygiene rules and disinfect any equipment you use.
- Choose a mild day. If it is too hot you may lose the seedlings. Transplanting stresses the seedling. They will need some pampering (semi shade and perhaps extra watering)for a couple of weeks after the process
- Make sure your seedlings are well hydrated by giving them a thorough watering or immerse them in a tub of water a couple of hours before disturbing the seedlings.
- Loosen the soil by squeezing together the corners of the tube.
- Remove seedlings from tube. Put seedlings that are to be transplanted into wet newspaper folded over the roots to keep them from stressing while waiting to be transplanted. To minimise shock and stimulate root growth, seedling roots can rest in a weak solution of a seaweed based liquid fertiliser for indigenous seedlings (make sure only the roots and not shoots are submerged).
- Empty remaining soil out the tube that you will put the transplanted seedling into. You will reuse this potting mix.
- Half fill empty tube on the diagonal so that there is a clear path to the bottom of the tube. Lightly pack the soil so that it will stay in place when you turn the tube upright.
- Roots longer than the tube should be trimmed back to ½ the length of the tube (the tap root grows quickly; this is the reason to transplant as early as possible while the root is still relatively short). It is very important to keep the root straight and not bent, curled or twisted. Bent roots will continue to spiral (this is known as root girdling). When the seedling is planted out the root system will not spread. Later in life as the tree grows larger it will not have the root mass to sustain the head of the tree and it will fall over.
- Place the seedlings against the side of the soil so that the uppermost roots (usually there is a change of colour between the stem and the neck of the root) are a few millimetres under the surface and gently back fill the tube with soil. Make sure the roots are straight downwards in the tube.
- You can put two seedlings in the tube if you have extra. This way if one seedling does not survive transplanting the other might. You can thin the extra one later.
- Hold the seedling head lightly between your first two fingers to hold the seedling in place while you gently tap the tube so that the soil settles and the seedling stays in the position aligning the root neck with 1.5 cm mark on the tube. Do not pack the soil with your fingers.
- The soil will settle leaving your seedling sitting with some of the root exposed. Add more soil to each side of the seedling. Gently tap tube (while still holding on to the seedling keeping it the height you require) settling soil again. Do not let the seedling slip low in the tube while the soil is settling.
- Water the seedling. The soil will settle again. More soil may be required to top up.
- When transplanting is finished, make sure the seedlings are labelled. Try to only do one species at a time. If you transplant more than one species, you must tag them so they can be returned to their original boxes to prevent confusion.
- A seaweed based liquid fertiliser for indigenous seedlings after transplanting will help prevent shock. It can also be used to continue growth later in the process where the slow release nutrients have diminished.
- Place the (identified) transplants on the raised, shaded, sheltered site, for 10-14 days for them to settle. After the recuperation period and the seedlings are stabilised place into the direct sun to strengthen.
Poorly transplanted seedlings
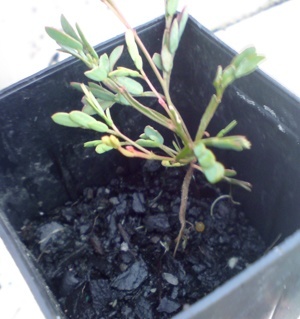
This affects the end quality of seedlings greatly. In this image the root is showing after the soil has settled.
Soil is too low on seedling stem – soil settles after watering – be sure to top up soil to cover white area. You can see on the right side of the tube a ridge that indicates where the soil level should be. Water will fill the space between the soil and tube top when watering. This excess water can cause collar rot or drown the seedling.

